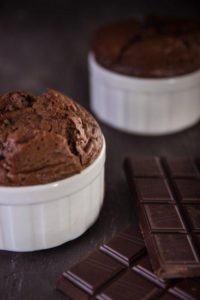
Photography Tips – How to make your plate shine on Instagram
Photography is more than just a trending topic nowadays, it is a full blown craze and shows no signs of falling out of favour, much to the dismay of many. Cooks love to take snap shots of the food for their friends on social media. Even if you lack a blog or do food photography as a hobby, you may still want to share the food you cooked a few days ago with friends on social media. Some people even seem to take more pride in the photos than they do in eating the food itself.
Food photography can be quite challenging though, as everything in the photograph is a decision. You must strike the perfect balance between art and reality. Every piece of the photo should be well placed. The beginning is always frustrating, but you must keep going until you reach technical proficiency with your camera. The goal is to improve your photography beyond the basics irrespective of the kind of food you want to snap shoot. It could be the chicken recipe or perfect cocktail. A photograph tells a thousand stories.
However, some snap shots have more complicated stories than others and may look like plenty of work when that is not the case. Below are quick food photography tips you can use:
Choose the angle
There are few camera angles that you can use time and again. However, you need to make a conscious decision before taking the photo. The camera position will affect the type of story your food photography will tell.
Always consider the food beforehand. Find the height, size, shape and other unique things about the food. Place the camera where the snap shot will highlight all these qualities. Some foods will look great when taken when looking down at your table while others look great when you take them right in front of your food.
Try taking your food photographs from multiple angles. Move around the plate at various angles such as 45-degrees, directly above and other angles to get the best angle.

Surround your head
When taking a snap shot in front of the food, try to get a great background and foreground to play with. Use the empty spaces to tell your story. Surround the main dish with other props and ingredients relating to the food. Ingredients, oils, cooking utensils and sauces indicate how you made your recipe. Tins, herbs, fabrics, linens, and jars speak volumes about the origin of your food or the season it is being served. Place a few of the ingredients in your background and foreground to give your story depth and elevate the story.
Make it as natural as possible without modification
Light is king. You can get few tools to bring the food photography to the next level. Poor use of the light can ruin the story and turn off the audience. Therefore, ensure the light is not distracting your food photos. Direct light gives the food reality. The shadows soften the image to give it an outstanding appeal. Check tip 1 in the article here to see what kind of things are possible.
You can place a diffuser between your table and window when working with direct sunlight. The diffuser improves the quality of light and softens the bright highlights and dark shadows by direct sunlight.
Use black cards to block light from areas that compete with your primary focus. The technique creates low-key, more colored images. Use white cards to bounce more light into shadow areas to reveal important details. Black cards make shadows stronger and give the photograph more contrast.

Minimize clutter
If the jar, spoon or napkin in the background does not add value to the photo, remove it before it brings distraction from the main interest. The main focus should be on things that add value. However, do not zoom too close that give your viewers trouble telling what the food is real. Styling is key here, but it is a detailed topic to go into. Check the styling tips in this article, to see what else you might want to try.
Stabilize the camera
Make sure the camera is stable. You can use a tripod, wall or chair to get the best shot. Remember, the food is not going anywhere and as long as your camera is still the photo will not be blurry. When the camera is shaking, you get blurry pictures. Therefore, hold your camera studies. Use a faster shutter speed or raise your ISO to reduce the light amount your need.
Learn your camera settings
This ensures you do not adjust the camera to a wider aperture which has a shallow field depth. Most food photos look great when you only focus on a small portion. Learn to white-balance the shots either on your computer or when shooting.
Avoid using built-in pop-up flash
This usually creates shadows and harsh highlights. Shoot RAW as it enables you to adjust your shot on the computer later without amplifying noise or losing detail. First get some safe shots and evaluate the photo. You can take 20 or 30 shots of a single food serving and pick the best later.
Use a medium focal length macro lens
The camera lens does better at open apertures. Besides, you can use the collapsible bounce reflector to fill in the dark areas of the shot.
